Blog Layout

Denver Resident Home Renovation Tips for 2020 By Advantage Services

Jerry Chadwick • Jan 24, 2020

Tips from a renovation professional in 2020

Here’s advice from industry experts on how to tackle your own home renovation project in the new year.

  •  
  •  
  •  
  •  
  •  
  •  
  •  
  •  
  •  
  •  
  •  
  •  
  •  
  •  
  •  
  •  
  •  
  •  
  •  
  •  
  •  
  •  
  •  
  •  
  •  
  •  
  •  
  •  
  •  
  •  
  •  
  •  
  •  
  •  
  •  
  •  
  •  
  •  
  •  
  •  
  •  
  •  
  •  
  •  
  •  
  •  
  •  
  •  
  •  
  •  
  •  
  •  
  • 1/52 London's best home extension

'The Chapel' in Southwark by Craftworks architects has been named London's best home extension at the Don't Move, Improve! 2019 awards.

Edmund Sumner

  • 2/52 First prize

The Chapel includes a new lower ground level for bedrooms, a large ground floor living space with vaulted ceiling, and a mezzanine level inserted as a space for privacy.

Edmund Sumner

  • 3/52 First prize

The ‘tent’ roof allows for flexible living needs whilst bringing skyward views and maximising daylight.

Edmund Sumner

  • 4/52 Second prize

Stego in Southwark by Archmongers LLP

  • 5/52 Joint third prize

Lauriston Road in Hackney by Gundry + Ducker

Andrew Meredith

  • 6/52 Joint third prize

Lauriston Road in Hackney by Gundry + Ducker

Andrew Meredith

  • 7/52 Joint third prize

Folded Wedge Townhouse in Lewisham by Russell Hunt Architects

Clive Sherlock

  • 8/52 Joint third prize

Folded Wedge Townhouse in Lewisham by Russell Hunt Architects

Clive Sherlock

  • 9/52 Most innovative

Loft Library in Waltham Forest by Arboreal Architecture has 40 metres of book storage

Juliet Murphy

  • 10/52 Best historic intervention

Tower House by Dominic McKenzie Architects

Will Pryce

  • 11/52 Best interior

Crouch End House in Haringey by Catriona Burns Architects

Adelina Llieve

  • 12/52 Best use of materials

Kings Grove in Southwark by Al-Jawad Pike

Ståle Eriksen

  • 13/52 Joint most cost-effective

Scissor Truss House in Lambeth by Studio MESH

  • 14/52 Joint most cost-effective

Breakout Extension in Crouch End, Haringey, by KNOTTARCHITECTS

Diana Cotovan

  • 15/52 Most sustainable

Reuse Flat in Hackney by Arboreal Architecture

A zero-waste renovation, reusing old materials and designing for the disassembly and reuse of those materials in the future

> Scroll right to see the shortlisted London projects...

Agnese Sanvito

  • 16/52 Shortlisted

16 Ewelme Road in Lewisham by uvarchitects

David Butler

  • 17/52 Shortlisted

Tile House in Hackney by Beasley Dickson Architects

Agnese Sanvito

  • 18/52 Shortlisted

Claylands Road in Lambeth by Conibere Phillips Architects Limited

Peter Landers

  • 19/52 Shortlisted

Claylands Road in Lambeth by Conibere Phillips Architects Limited

Peter Landers

  • 20/52 Shortlisted

Shad Thames Water Tower in Southwark by FORMstudio

Mike Neale

  • 21/52 Shortlisted

Shad Thames Water Tower in Southwark by FORMstudio

Mike Neale

  • 22/52 Shortlisted

Micheldever Road in Lewisham by Meme Architects LLP

Sam Grady

  • 23/52 Shortlisted

Micheldever Road in Lewisham by Meme Architects LLP

Sam Grady

  • 24/52 Shortlisted

Brockley House in Lewisham by SAM Architects

Da Feng

  • 25/52 Shortlisted

Algiers Road in Lewisham by Gruff Limited

  • 26/52 Shortlisted

Algiers Road in Lewisham by Gruff Limited

  • 27/52 Shortlisted

Mies X King George in Islington by CAN

Jim Stephenson

  • 28/52 Shortlisted

Hackney Extension in Hackney by Proctor & Shaw

Ben Blossom

  • 29/52 Shortlisted

The Black Curve in Bromley by Ar’Chic

William Eckersley

  • 30/52 Shortlisted

Dartmouth Park family house in Camden by Pardon Chambers Architects

Caroline Mardon

  • 31/52 Shortlisted

Dartmouth Park family house in Camden by Pardon Chambers Architects

Caroline Mardon

  • 32/52 Shortlisted

Dusheiko House in Hackney by Neil Dusheiko Architects

Architect Neil Dusheiko completely remodelled his family's home, designing it around the need for more light, space and generous storage, in their choice of materials.

Neil Dusheiko

  • 33/52 Shortlisted

Dusheiko House in Hackney by Neil Dusheiko Architects

The ambitious year-long project began last year. It included raising the low basement ceilings by a foot, which costs much less than digging down, the more common course of action. "It saved £60,000,” says Neil.

Agnese Sanvito

  • 34/52 Shortlisted

Dusheiko House in Hackney by Neil Dusheiko Architects

Neil designed the loft extension to hold a peaceful parental bedroom with an en suite bathroom. The glass-fronted shower has a skylight that slides fully open to the sky. "Imagine bathing in the open in the middle of London,” Neil says.

> Read more

Tim Crocker

  • 35/52 Shortlisted

Roslyn Road in Haringey by Magri Williams Architects

Nicholas Worley

  • 36/52 Shortlisted

Woodworker's Studio in Islington, by Bradley Van Der Straeten

A lower-ground-floor extension, housing a woodworking studio, study, music studio and ample concealed storage.

  • 37/52 Shortlisted

Outhouse-In in Westminster by con | form architects

Simone Bossi

  • 38/52 Shortlisted

Montague Court in Hackney by IF_DO

  • 39/52 Shortlisted

Long House in Southwark by R2 Studio Architects

Andy Stagg Photography

  • 40/52 Shortlisted

Link Building in Southwark by Powell Tuck Associates

Christopher Horwood

  • 41/52 Shortlisted

Highbury New Park in Islington by Appleton Weiner

Lyndon Douglas

  • 42/52 Shortlisted

Highbury New Park in Islington by Appleton Weiner

Lyndon Douglas

  • 43/52 Shortlisted

Folded House in Wandsworth by Proctor & Shaw

Ståle Eriksen

  • 44/52 Shortlisted

Folded House in Wandsworth by Proctor & Shaw

Ståle Eriksen

  • 45/52 Shortlisted

Garden House in Hammersmith and Fulham by Teatum + Teatum

Luke Hayes

  • 46/52 Shortlisted

Garden House in Hammersmith and Fulham by Teatum + Teatum

Luke Hayes

  • 47/52 Shortlisted

Cornerstone House in Haringey by Merrett Houmoller Architects

  • 48/52 Shortlisted

3 Elm Close in Islington by Ulla Gala Architects

  • 49/52 Shortlisted

Levels Ten + Eleven in Westminster by con | form architects

Simone Bossi

  • 50/52 Shortlisted

Sash House in Westminster by Tigg + Coll Architects

Andy Matthews

  • 51/52 Shortlisted

Montague Court in Hackney by IF_DO

  • 52/52 Shortlisted

Step House by Bureau de Change architects

Ben Blossom

Top of Form

Unless you have nerves of steel, a degree in engineering, psychic powers and bottomless pockets, the process can feel overwhelming.

Knowledge is power, though, and understanding the pitfalls and the process will help. Here’s advice from industry experts:


1. Don’t rush the design stage
Planning your project may well take longer than executing it, but Viki Lander, creative director at Wandsworth-based interior design and architecture practice Ensoul, says it is worth taking your time to get it right. “Design every detail up front and build to detailed plans,” she says. “Don’t design on the fly with builders on site. What seem like small changes can have a serious knock-on effect if not planned properly at the start.”

2. Don’t expect miracles
“Very few extensions or major refurbs involving significant structural work and drainage alterations can be done to a good quality in less than five or six months,” says Jeff Kahane, founder of architects Jeff Kahane + Associates in NW1.

“Internal reforms can be done more swiftly, but the last stages of any building job will inevitably slow down - if only, for example, to avoid carpenters creating dust when the painters are trying to get a flawless finish on their eggshell. Unduly rushed building work will almost always come back to haunt the client.”

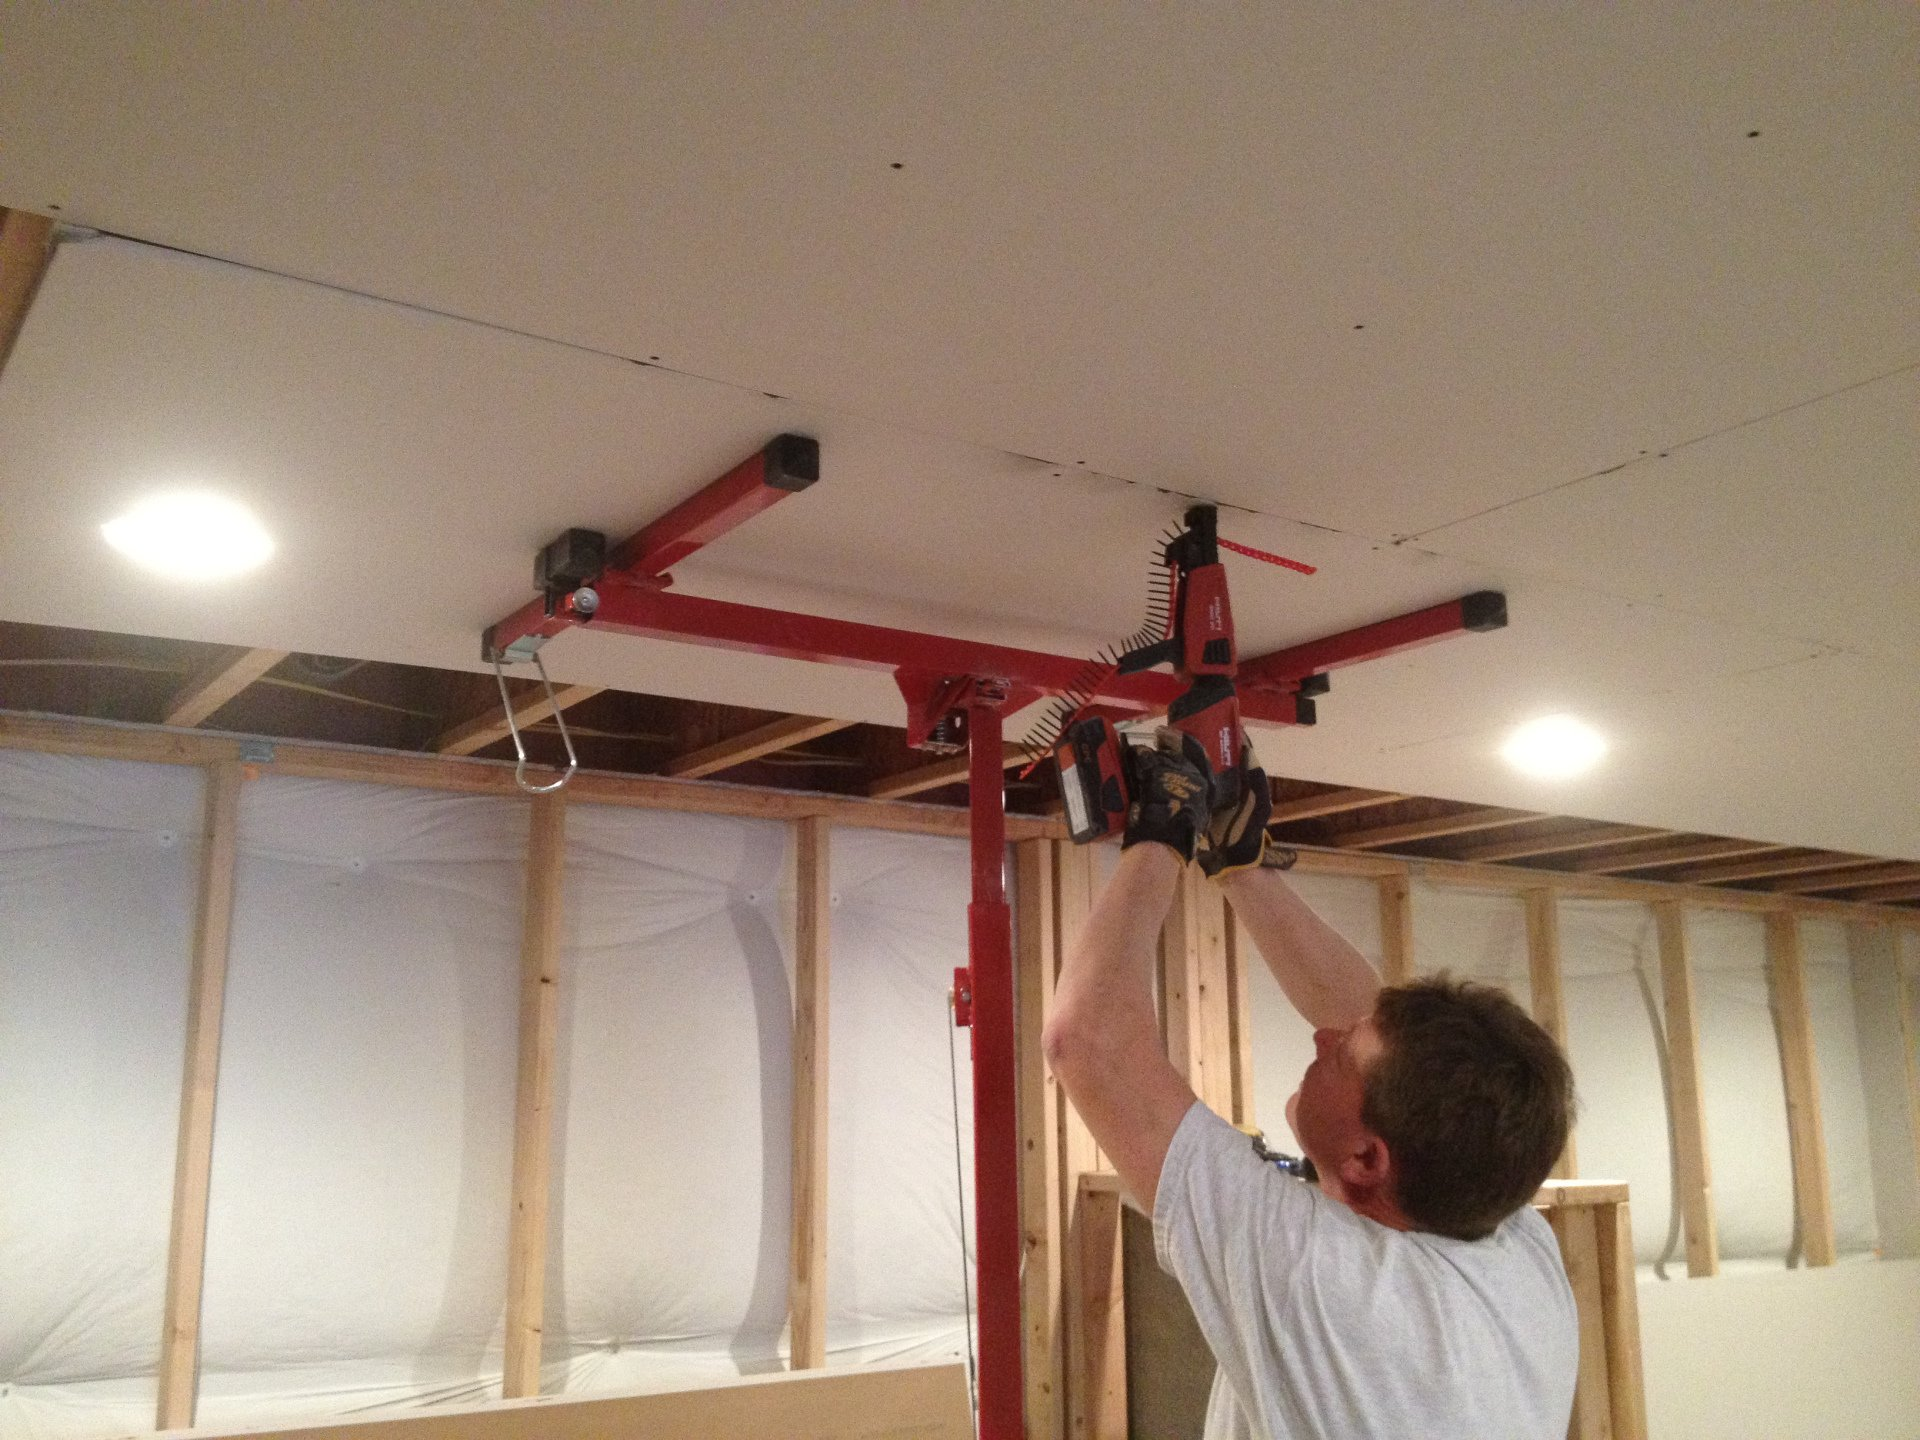
3. Find a great builder
This will make your life so much easier. Ask friends for recommendations and take references. “Tender your building works with at least three builders,” says Viki Lander. “It’s the only way to ensure you are getting good value for your project.”

Take the time to go and see some of their previous projects. “It is also very important to see their work beforehand so that you understand the finish you will be paying for,” says Emily Burnett, practice director at Brockley-based architects Gruff Limited. “If you are particular about the final finishes being perfect, then you need to ensure your contractor can produce this.”

4. Buy cheap, buy twice 
“Projects often run into problems if clients opt for the cheapest tender,” warns Henri Bredenkamp of Studio 30 Architects in SE14. “Small builders often don't use quantity surveyors and sometimes get pricing wrong, or do not fully comprehend the level of detail involved in a project.”

Bredenkamp’s advice is that if one quote is much cheaper than the rest you should be suspicious and treat it with caution. “If a price sounds too good to be true, it generally is,” he says.

5. Call in the professionals
What with builders, architects, party wall surveyors and building control costs, professional fees will add a big chunk to your outlay. But unless you really understand the process, don’t skimp on experts if you are doing a big project.

In particular Ben Wilson, managing partner of boutique developer Knight James Developments suggests you appoint a quantity surveyor.

“If you are undertaking a large project, especially one running well into six figures, a quantity surveyor is worth his or her weight in gold,” he says. “They can drill down on the numbers to a level of detail that a builder won’t and this can really help you get your budgeting right and your costs low.”

6. Signed, sealed, and delivered
Once you have a builder in place, don’t go on a handshake. Draw up a contract detailing exactly what they are going to be doing and how long it will take.  “A building contract acts as a framework for the contractor to undertake the work and for you to monitor progress,” says Gruff’s Emily Burnett.

Of course during the build things can, and will, change, but a contract at least means you start out singing from the same hymn sheet. Your contract should also include a payment plan – a timetable of when the builder will invoice you during the work, and for how much.

7. Don’t forget the small stuff
When you are working out how much the whole thing costs, include every little thing. It might sound overly pernickety, but it is astonishing how much door handles, light switches, towel rails and bookshelves can add to costs. “Don’t forget to add VAT,” says Ensoul’s Viki Lander. “Most quotes from builders and suppliers come in excluding VAT. It sounds obvious but it adds 20 per cent to your project costs, so make sure you include it in your sums.”

8. Supply and demand
Shop around when buying materials for your project. “I tend to try to use suppliers who are as far out of London as possible,” says Ben Wilson. “Invariably their prices are lower, as they aren’t paying for expensive London premises. I also try to avoid mentioning that my projects are based in central London, at least on the initial enquiry. Some suppliers are happy to raise their quotes if they know the products are ending up in an expensive part of the country.”

9. Prepare for emergencies

Things can, and inevitably will, go wrong, and that means that costs are going to rise. You must, must, must have some money tucked away to cover unexpected extra costs or you could end up with a half-built home. Jeff Kahane suggests a minimum of five per cent of the total build cost, and ideally around 10 per cent.

10. Should you stay or should you go?
Most architects and builders advise you to move out for the duration of the work – they don’t want you under their feet and can get it done quicker in an empty property. Living amid a build will also be stressful and very, very dusty. Unless you have ultra-kind friends and/or relatives with enough room for you, the kids, pets and all your furniture, this is going to mean a return to the wonderful world of renting.

Kahane says the decision on whether to stay put depends on the size of your property. “With a large house the scope sometimes exists to divide the works into two or even three phases, so as to minimise rental costs,” he says.

“The first phase, where the builders are doing all the external prep work; the second where the clients retreat to occupy maybe half the property and the builder sets up a micro-kitchen (often at minimal cost) using cannibalised elements of the old kitchen, and the third phase, where they vacate completely.”

11. Steel yourself
Renovating or extending your home can be thrilling as things come together but Nick Willson, director of Nick Willson Architects in N1, warns that clients also need to mentally prepared for ups and downs.

“The emotional impact should not be underestimated,” he says. “Having a bunch of builders and others in your house for the best part of a year can be hard, projects can be delayed - and projects always hit a poor spot at some point, whether it is a cost or timing issue. So I always advise clients that the process should be fun, and as enjoyable as possible, but it can also be an emotional investment, too.”

09 Dec, 2021
Finishing a basement is a great way to add livable square footage to your home without having to build a new addition. And while finishing a basement often seems like a DIY job, there are aspects of it that require expertise from professionals. To help you started, we’ve rounded up some essential tips for finishing a basement.
By Jerry Chadwick 09 Dec, 2021
When planning a kitchen remodel timeline, most homeowners want to know the best time to start in order to be completed by a specific date. Therefore, at Advantage, we often get asked the question, “How long does it take to remodel a kitchen?” There are 3 basic phases of a kitchen remodel: design, planning and production. Your timeline will depend on the size and type of kitchen remodel, but it generally takes between four to six weeks to remodel, if you do not include the planning and design phases. PLANNING AND DESIGN TIMELINE OF A KITCHEN REMODEL If you are considering a kitchen remodel, it is extremely important to take as much time as you need to plan. Each and every detail will need to be thought through and planned for, and you want the end result to be exactly as you’ve envisioned it. If you have the ability to print out or email pictures of elements that you would like to be incorporated into the design of your kitchen, please do this. Pictures can save on design time and ensure accuracy in communicating your vision. Advantage Services ll can provide accurate drawings to help you visualize your remodeled living space. It is very important to work with a design/build company that can show you design and product options, and their associated costs. It is also important to clearly communicate your budget to your design build company so they can help you keep watch on your budget throughout the process. At Advantage Services llc we provide our clients with 3D renderings of their kitchen design so that they know what their future kitchen will look like. We believe this service is in the best interest of the client-provider relationship. After all, it is much easier to make a change to a drawing than it is to make a change after the project is underway. Clear communication is paramount through the remodel process, and Advantage is committed to making every reasonable effort to ensure the process is free of unexpected issues and unmet expectations. During the design phase, you will be able to pick out your selections for your new kitchen. Countertops, backsplashes, appliances, lighting, drawer pulls, cabinet color and style – all of these details are decided before demolition begins. After all of these details are collected, the project moves to the planning phase. The planning phase is where the project is broken down into parts. Each part of the renovation process is given tasks with dates, provider, and a materials list. This becomes the master schedule for your project. You will be provided with the schedule, so you know what to expect, who to expect, and when to expect them by. This is also important because every project has milestones, and once a milestone is completed, you should expect to be billed for the services provided related to that milestone. Your project representative will show you this schedule with milestones up front to make sure that both the schedule and the billing milestones are suitable for you. SPECIALTY MATERIALS WITH WAIT TIMES When you are planning for a kitchen remodel, remember that specialty appliances and other specialty items may have a wait time. It is important to factor in this wait time into the master schedule. Certain tile and stone products and custom-fabricated furniture may also have a wait time associated with them. Advantage offers custom and semi-custom cabinets, and these can take between four to eight weeks to receive. Stock, or ready-made cabinets can have a shorter wait time, but still need to have at least 2 weeks set aside. If you want granite countertops, your Advantage representative will go with you to select the actual slab you like. This guarantees you are getting exactly what you want. This is a part of the Advantage Services llc design process. If there is a unique tile backsplash you love or want to have custom-designed, or if you are using custom tile or other specialty material for flooring, this will need to be ordered before the demolition process begins as specialty tile and flooring can also have a wait time. PHASES OF THE KITCHEN REMODEL PROCESS After you’ve approved (and hopefully fallen in love with!) the design of your new kitchen, you’ve selected all your materials, and you’re happy with the suggested schedule, your remodel project can get started. Your remodel schedule should reflect approximately 4-6 weeks of work. We’ve divided the work into 6 steps: Step One: Removal of Existing Kitchen & Evaluation Removal of the old kitchen, including removing old appliances, cabinetry, countertops, flooring, etc. happens on the first day. After everything has been removed, we evaluate the floors and ceilings and address any modifications that need to be made with you. Modifications that need to be made are considered change orders, therefore, we will not move forward on the project until we’ve discussed and agreed on how to proceed. Step Two: Rough-in All Electrical, Set up / Install Mechanicals The mechanical installation is the second stage of the remodel process and can take about five days to complete. It is during this step of the kitchen remodel timeline that new plumbing, HVAC and electric is installed. Most kitchen remodels require new light fixtures at the very least. Some projects require all new electric completely. Each location for outlets, lighting, switches, and appliance power feeds are clearly marked. This process removes any guesswork for the electrician and enables him to wire and install the new system in a timely manner. If requested, speaker wire, cable wire, and other home automation product wiring will be added at this time. Most projects require an inspection prior to adding insulation and covering with drywall. Inspection will be scheduled and completed when all plumbing, HVAC, electrical, and home automation installation is complete. Step Three: Insulation, Drywall Installation, Finishing & Priming, Flooring Upon completion of the mechanical phase and its inspection, we will begin insulating your kitchen, hanging the drywall, finishing the drywall and priming for paint. Flooring installation follows (if you are replacing the existing floor). Step Four: Cabinet Installation, Countertop Templating, Fabrication, and Installation For many clients, the day cabinetry is installed is a very exciting day! The kitchen cabinets are installed with precision, and crown molding is added to finish the look. Next on the list is templating the countertops. The countertop area is measured with precision to ensure your new countertops fit like a glove. On average, two weeks will pass between the time the countertop is templated to the time the countertop is installed. Step Five: Final Interior Finish Stage and Painting The interior finishing phase typically includes installation of the plumbing fixtures, decorative backsplashes, trim, and baseboard. Painting is completed during this phase as well. Step Six: Installation of Electrical Fixtures & Appliances and Final Cleanup This time is used for small touch-ups and fine-tuning to ensure that all your expectations were met. A kitchen remodel is an undertaking that requires thoughtful planning and accurate coordination to prevent delays and costly mistakes. If you are considering a kitchen remodel and would like to talk through design, timeframe, and cost, please give us a call. We’d be happy to address any questions or concerns you may have.
By Jerry Chadwick 07 Dec, 2021
Whether your old toilet is damaged, or you're remodeling or simply want to upgrade, installing a new toilet is an easy DIY project. And if you're willing to give it a try, you might save big. Here's your quick guide to how we do our toilet installations.
By Jerry Chadwick 15 Mar, 2020
Renovating a kitchen is a home improvement thrill ride. Each twist and turn brings new excitement as design elements are chosen and materials are selected. When you reach the part of the ride where you’ve found a contractor you can trust and a design that fits your budget and style, it’s time to throw your hands up and scream with glee. However, there is one part of the ride that can be extremely scary and often intimidates many people from renovating their kitchen. Staying on budget can prove to be particularly challenging for a lot of homeowners. Without the proper precautions, you may find yourself barreling off the tracks and in a heap of trouble. According to a recent study by Houzz, only 4% of home remodeling projects come in under budget. So how can you limit your chances of blowing the budget on your kitchen renovation? At Advantage Services llc, we understand that sticking to a budget takes a cooperative effort between the designer, contractor, and the homeowner. After a design is finalized, a design contract is detailed to not only provide a 3-D rendering of the project but to also provide a list of materials and known expenses. Although there is a chance of small unexpected twists and turns, meticulous planning can capture a lot of the factors that impact the overall cost of your renovation. Material upgrades can be one of the big influences that can cause the bottom to drop out from your budget planning process. One of the most invigorating parts of the process comes when a client begins to pick out specific countertops, hardware, lighting, and various components. This is where a project could go completely off-track. During the design and proposal stage, your kitchen remodeler and the designer will give generalized pricing guidelines for material costs. Even if mid-grade products are anticipated, choosing several premium products could increase your project costs by 15-20% or more. Most kitchen renovation projects we partake of include, at least, one type of upgrade, despite a thorough design discovery phase. Clients often later fall in love with a style of lighting, trim element, or countertop material that wasn’t originally planned for by either party. Since kitchen remodeling choices remain in homes for decades, homeowners often gravitate to selecting upgrades mid-project in fear of future regrets of denying themselves improvements. In order to keep your kitchen renovation project from coming to a screeching halt, we have the following suggestions: • Do lots of preliminary research to learn specific design elements that are make-or-break choices to match your style. • Only work with a kitchen renovation company that provides you with a comprehensive plan that includes product specifications, 3-D drawings, and a detailed proposal. • Spend plenty of time with your contractor during the initial planning phase. Discuss material options and ask to see physical samples of products. • Make sure your kitchen designer or contractor informs you of the overall cost increases of upgrades. Materials measured in smaller units like square or linear feet can add up quickly. Ask for the total upgrade cost. • Plan for a 15% or more contingency in your budget. That way you won’t be thrown for a loop with extra costs. Whether part of upgrading aesthetics or preparing a home for resale, kitchen renovations are one of the most likely and popular of home improvement projects. Don’t be intimidated, you’ll find the experience is bound to amaze. If you’re ready to jump in and buckle up, we’d be excited to enjoy the ride alongside you. At Advantage Services llc we are very good at staying on budget and let our customers know where they stand every step of the way. Call us today for Kitchen Remodel and Free 3D Design Advantage Services llc 303-467-3373
what is the proper height to install a tiled shower border
By Jerry Chadwick 09 Mar, 2020
Advantage Services explains, from a design standpoint, what is the proper height to install a tiled shower border? Denver's choice for remodeling!
By Jerry Chadwick 01 Mar, 2020
A large amount of us are visual people and have a hard time imagining what a room would look like if remodeled. Advantage Services LLC understands this and is pleased to provide design-build services. Advantage Services llc can provide accurate drawings to help you visualize your remodeled living space. Removing walls, re-purposing closets, and other spaces, laying out a new kitchen or bathroom– these are all projects that Cedars Woodworking can bring to life by CAD and other drawings. This means that if you are remodeling a part of your home, we can provide detailed drawings to show you what your space will look like when it is finished. Design-Build also means that upon design approval, Cedars Woodworking can coordinate your project from construction to completion. The benefits of utilizing Advantage Services llc’s design-build services include: 1) Involvement – we know how important it is to give you what you want. We’ll keep you in the loop! 2) Open Communication – ensures expectations are met and clearly defined 3) Collaboration – utilizing synergies to the client’s advantage to ensure project excellence, quality service, and the ability to meet budget requirements 4) Reduced Stress – ensuring seamless Communication between subcontractors (when needed) and vendors 5) Expertise – you can be assured we know each aspect of the project and that every detail is completed correctly 6) Efficiency – our design-build services team is involved from start to finish, which means that it is less likely for details to fall through the cracks 7) Accountability – Cedars is accountable for timeline, budget, and result of every design-build project 8) Teamwork – everyone involved in a design-build services project is on the same team, which means we all have the same goal of a successful project and full client satisfaction Consider using Advantage Services LLC to design and build your new living space! Visit our gallery for ideas to transform your home!
How To Repair Drywall | View This Guide For Step-By-Step Instructions
By Jerry Chadwick 29 Feb, 2020
Advantage Services can patch and repair drywall holes or replace entire sheets of drywall if needed. This DIY guide will help you get started or you can hire a professional.
how to control drywall dust during a remodel
By Jerry Chadwick 17 Feb, 2020
Advantage Services explains how they use BuildClean technology in order to control dust. A wonderful solution for Denver home remodeling projects!
Renew Your Denver Bathroom With A Modern Tub-to-Shower Conversion
By Jerry Chadwick 11 Feb, 2020
Advantage Services offers a mini curb or standard curbed tub-to-shower conversion. Whether you’re looking to make your shower more accessible or you don’t have a need for a bathtub.
Timeless Kitchen Trends To Consider For Your Kitchen Remodel Project
By Jerry Chadwick 31 Jan, 2020
From white paints to shaker style cabinets, which drawer organizers to use and more, Advantage Services has been building amazing kitchen renovations in Denver for 20 years!
More Posts
Share by: